4th of July Apple Pies!

The 4th of July is just around the corner! What does that mean? That means, sparklers, chips n' dip, friends and family, and of course APPLE PIE!
Apple pie is one of the most important American desserts. It's perfectly tender apples drenched in a sweet cinnamon and butter glaze all wrapped perfectly in a flakey crust are a symbol of American pride.
Now everyone has their own secret recipe for apple pie but today I'm going to share mine with you.
For the Pie Crust
2 1/2 cups -- Flour
1 1/4 tsp -- Salt
1 TB, heaped -- Sugar
1 cup -- Unsalted Butter (2 sticks)
1/4 cup Milk
1/4 cup Buttermilk
Tools
Knife
Bowl
Bench Scrapper
Rolling Pin
Process
Sift together the flour, salt and sugar. Set aside.
Begin with very cold butter, right out of the frige is best. Cube the butter into medium size pieces. Toss the butter in the flour. When all the pieces have been coated in flour, gently turn ingredients on to a clean, dry work surface. Using a rolling pin, roll the pieces of butter into the flour until each piece looks like a long scrap of paper. Refrigerate this for 10-20 minutes.
Scale your milk and buttermilk just before you're ready to use it. Make a well in the middle of the flour butter mixture. Pour all of the milk and butter milk directly into the well and using a spatula, gentle toss and fold the flour around so it all is lightly moistened.
Turn out your dough on to a lightly floured surface. Your dough should be very crumbly and look "too dry" at this point. "Dough" not worry thought! (sorry for the lame pun, I couldn't resist!)
Press your crumbly dough together to make it somewhat round.
Take the top half of this and fold it on top of the other half and press it down, GENTLY! Rotate the dough 90 degrees and repeat this process 3 more times for a total of 4 folds. This will help your dough have layers of buttery goodness. Form the dough into a round again, and wrap in plastic wrap.
Refrigerate for 1 hour, up to 3 days or 2 weeks frozen.
For the Apple Filling
7-8 ea -- Granny Smith Apples
1 TB -- Lemon Juice, fresh squeezed, please
1/4 -- cup Brown Sugar
1/4 cup -- Granulated Sugar
1 1/2 tsp -- Cinnamon
1/4 tsp -- Cloves
1/4 tsp -- Nutmeg, freshly grated
1/4 tsp -- Salt
2 1/2 TB -- Unsalted Butter
1 TB + 1 tsp -- Corn Starch
Tools
Peeler
Apple Corer
Knife
Cutting Board
Small Sauce Pan
Heat Proof Spatula
Process
Core, peel, and slice the apples, immediately toss them in the lemon juice. These will keep them from turning that gross brown color. Toss the apples in the sugar and spices. Keep the corn starch and butter for later.
Refrigerate these for 30 minutes

apples have been tossed in the sugar mixture and are ready to be refrigerated.
Remove from frige and strain the apples and keep the juice. Set aside the apple pieces. Put the juice into the sauce pan with the butter and corn starch. Melt the butter and cook this mix over medium heat for 1-2 minutes while stirring, until it starts to reduce a little bit.

This is what the liquid should look like.
Remove from heat and pour it over the apple slices, toss until coated.
Refrigerate until ready to fill the pie
For the Crumble
1/2 cup -- Flour
1/2 cup -- Brown Sugar
1 tsp -- Cinnamon
5 TB -- Unsalted Butter
Tools
Dough cutter
Bowl
Process
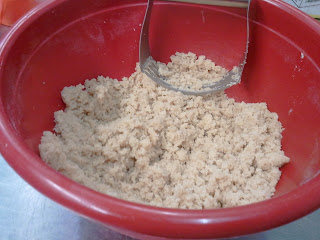
Mix together the flour, sugar and cinnamon. Cube the butter and cut it into the flour mix. Set aside until you're ready to assemble the pie.
Pie Crumble, Cut and ready for baking
Assembling the Pie
Preheat the oven to 375F
Take the pie dough out of the refrigerator and let it sit for 5 minutes. Turn out on to a lightly floured surface. Using a rolling pin, roll out your dough to 1/4" - 1/2" thick. Rotate your dough while rolling to keep it from sticking.
Gently lift up the pie dough, use your bench scraper if its stuck. Lay it across the top of a greased, glass pie pan. Do not stretch the dough, but gently form it to the shape of the pan. Trim the edges using a pairing knife. Pinch the edges for decoration or use a pie crust former. Dock the bottom and sides of the crust.

Pie dough, ready for rolling!
(If you have extra pie dough scrapes, lay the pieces one on top of the other and roll out to 1/2" thick. Use a knife or pizza cutter to cut the dough into stripes. Brush with egg wash, coat with cinnamon sugar, and bake until golden brown for a tasty treat <3)

Pie dough strips.
Take the apple filling out of the fridge, remix it so the apples are coated again. Now, for the filling of the pie their are two methods, both work well.
1. Gently pour the apples into the pie crust and even them out. This creates a slightly domed and homestyle effect.
2. Take apples out of the bowl by the handful and arrange them so they are all laying flat. This creates more of a layering effect.
Toss your crumble just before putting it on top so it isn't compacted. Coat the top of the pie with crumble, do not press it down. Brush the edges of the pie crust with egg or milk if you'd like a glazed look.

Just popped it into the oven!
Cover the pie with aluminum foil and bake for 30 minutes.

This is what mine looked like after 30 minutes
After 30 minutes, remove the foil and let it bake for another 15-25 minutes, until the a knife or tooth pick test reveals the apples to be tender but not mushy.
Let the pie cool on a cooling rack or a window sil for 3 hours.
Serve with ice cream, whip cream or just as is!


